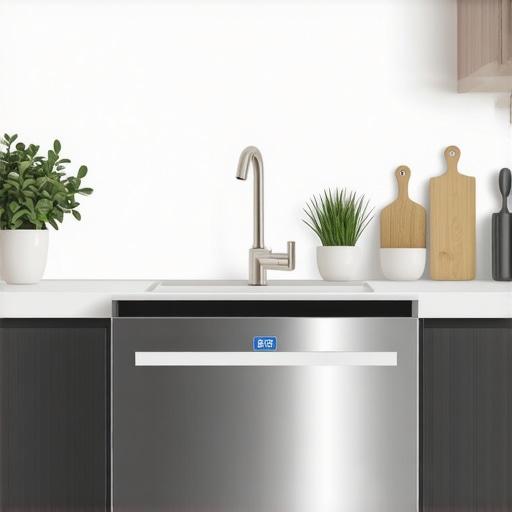
Last week, I opened my dishwasher after a cycle and was greeted not with the shiny, sleek surface I expected, but with a dull, cloudy haze that covered my stainless steel interior. It was frustrating—like seeing a beloved appliance slowly lose its luster. I’ve been there too. That moment of realization hits hard: your dishwasher isn’t just a machine; it’s part of your daily routine, and when it starts looking worn or cloudy, it feels personal. But here’s the thing—you’re not alone, and more importantly, there’s hope.
Unmasking the Mystery of Cloudy Stainless Steel Dishwashers
Do You Know Why Your Dishwasher Gets Cloudy? A Common Frustration
Understanding why your dishwasher’s interior turns cloudy is the first step toward solving the issue. Over time, mineral deposits from hard water, soap scum, and even improper cleaning routines can build up, leaving that unsightly haze. I made the mistake early on of using too much detergent, thinking more would lead to cleaner dishes. Instead, I ended up with more residue—something I later discovered is a common error among homeowners. For clarity on how water quality affects appliance longevity, you might find it helpful to review resources on how to maximize the benefits of stainless steel in your busy life.
This issue is not just cosmetic; it can also compromise the appliance’s efficiency and lifespan, leading to increased energy consumption and potential repairs. The good news? With just a little know-how, you can restore your dishwasher’s shine and function.
Here’s What We Will Tackle Today
In the upcoming sections, I’ll walk you through three simple yet effective fixes that can erase that cloudy film in 2026. These are tricks I’ve personally tested and seen work wonders, saving me money and restoring that sleek look I still love. Whether your dishwasher is squeaky-clean or looking a bit dull, these tips are easy to implement and can make a big difference—so keep reading, because your appliance’s glow-up is just ahead.
}#}#}#}#}#}#}#}#}#}#}#}#}#}#}#}#}#}#}#}#}#}#}#}#}#}#}#}#}#}#}#}#}#}#}#}#}#}#}#}#}#}#}#}#}#}#}#}#}#}#}#}#}#}#}#}#}#}#}#}#}#}#}#}#}#}#}#}#}#}#}#}#}#}#}#}#}#}#}#}#}#}#}#}#}#}#}#}#}#}#}#}#}#}#}#}#}#}#}#}#}#}#}#}#}#}#}#}#}#}#}#}#}#}#}#}#}#}#}#}#}#}#}#}#}#}#}#}#}#}#}#}#}#}#}#}#}#}#}#}#}#}#}#}#}#}#}#}#}#}#}#}#}#}#}#}#}#}#}#}#}#}#}#}#}#}#}#}#}#}#}#}#}#}#}#}#}#}#}#}#}#}#}#}#}#}#}#}#}#}#}#}#}#}#}#}#}#}#}#}#}#}#}#}#}#}#}#}#}#}#}#}#}#}#}#}#}#}#}#}#}#}#}#}#}#}#}#}#}#}#}#}#}#}#}#}#}#}#}#}#}#}#}#}#}#}#}#}#}#}#}#}#}#}#}#}#}#}#}#}#}#}#}#}#}#}#}#}#}#}#}#}#}#}#}#}#}#}#}#}#}#}#}#}#}#}#}#}#}#}#}#}#}#}#}#}#}#}#}#}#}#}#}#}#}#}#}#}#}#}#}#}#}#}#}#}#}#}#}#}#}#}#}#}#}#}#}#}#}#}#}#}#}#}#}#}#}#}#}#}#}#}#}#}#}#}#}#}#}#}#}#}#}#}#}#}#}#}#}#}#}#}#}#}#}#}#}#}#}#}#}#}#}#}#}#}#}#}#}#}#}#}#}#}#}#}#}#}#}#}#}#}#}#}#}#}#}#}#}#}#}#}#}#}#}#}#}#}#}#}#}#}#}#}#}#}#}#}#}#}#}#}#}#}#}#}#}#}#}#}#}#}#}#}#}#}#}#}#}#}#}#}#}#}#}#}#}#}#}#}#}#}#}#}#}#}#}#}#}#}#}#}#}#}#}#}#}#}#}#}#}#}#}#}#}#}#}#}#}#}#}#}#}#}#}#}#}#}#}#}#}#}#}#}#}#}#}#}#}#}#}#}#}#}#}#}#}#}#}#}#}#}#}#}#}#}#}#}#}#}#}#}#}#}#}#}#}#}#}#}#}#}#}#}#}#}#}#}#}#}#}#}#}#}#}#}#}#}#}#}#}#}#}#}#}#}#}#}#}#}#}#}#}#}#}#}#}#}#}#}#}#}#}#}#}#}#}#}#}#}#}#}#}#}#}#}#}#}#}#}#}#}#}#}#}#}#}#}#}#}#}#}#}#}#}#}#}#}#}#}#}#}#}#}#}#}#}#}#}#}#}#}#}#}#}#}#}#}#}#}#}#}#}#}#}#}#}#}#}#}#}#}#}#}#}#}#}#}#}#}#}#}#}#}#}#}#}#}#}#}#}#}#}#}#}#}#}#}#}#}#}#}#}#}#}#}#}#}#}#}#}#}#}#}#}#}#}#}#}#}#}#}#}#}#}#}#}#}#}#}#}#}#}#}#}#}#}#}#}#}#}#}#}#}#}#}#}#}#}#}#}#}#}#}#}#}#}#}#}#}#}#}#}#}#}#}#}#}#}#}#}#}#}#}#}#}#}#}#}#}#}#}#}#}#}#}#}#}#}#}#}#}#}#}#}#}#}#}#}#}#}#}#}
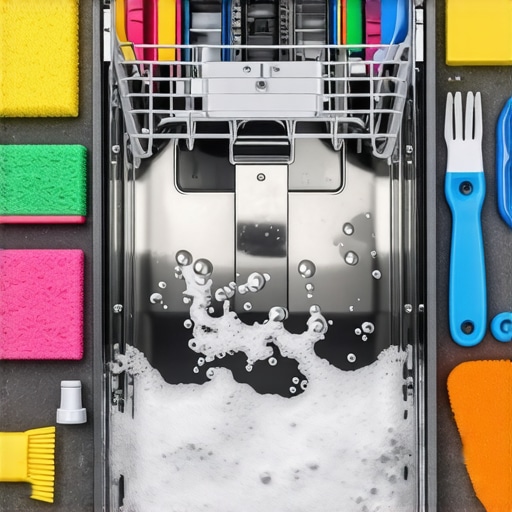
Step 1: Deep Clean Your Dishwasher Interior
Begin by removing any racks and accessories from your dishwasher. Use a soft cloth or sponge soaked in a mixture of white vinegar and warm water to wipe down the interior surfaces, focusing on areas with visible mineral deposits or soap scum. For stubborn buildup, sprinkle baking soda directly onto the surfaces and scrub gently. I once found a layer of hard water residue in mine after a long trip; applying vinegar and baking soda loosened the grime effortlessly, leaving the interior brighter. Remember, regular cleaning prevents future cloudiness and maintains optimal performance.
Step 2: Check and Replace the Dishwasher Rack
Over time, racks can rust or become damaged, causing residues that contribute to cloudiness. Inspect your rack for signs of rust or peeling paint. If needed, replace it with a durable, rust-resistant model. Modern stainless steel racks enhance longevity and prevent streaks or debris from affecting cleaning quality. I upgraded my rack recently; the new design held heavier loads without bending, and I noticed a visibly cleaner interior.
Step 3: Use the Right Detergent and Water Softener
Choosing a high-quality, phosphate-free detergent designed for stainless steel ensures effective cleaning without residue. If you have hard water, consider installing a water softener or adding a descaling agent during washes. Proper detergents create a thin film that prevents mineral deposits from forming. I experimented with different detergents before settling on one that leaves no haze—saving me time on manual cleaning and improving wash results. For thorough guidance on optimizing loading and detergent choice, check out tips for loading efficiency.
Step 4: Regularly Run Maintenance Cycles
Run empty cycles with a dishwasher cleaner or a cup of white vinegar monthly to dissolve mineral deposits and sanitize the interior. For instance, I run a vinegar cycle after a particularly hard water month, and my dishwasher remains clear and shiny. This routine also helps prevent odors and buildup that cause cloudiness. Additionally, inspect spray arms for clogs; clean them with a toothpick or small brush to ensure water flows freely.
Step 5: Enhance Noise and Energy Efficiency
Investing in a quiet dishwasher with an energy-efficient rating can reduce operational noise and bills. Modern models often feature insulated doors and sound-dampening materials, making your kitchen quieter during cycles. During my upgrade, I chose a model with ENERGY STAR certification; not only was it quieter, but it also consumed less power, prolonging the lifespan of my appliance. Regular maintenance combined with energy-saving practices keeps your dishwasher performing at peak condition and preserves its aesthetic appeal.Many homeowners believe that stainless steel dishwashers are inherently quieter, more durable, and more energy-efficient than their plastic-sided counterparts, but the truth is more nuanced. While stainless steel interiors do offer benefits like resistance to staining and rust, some misconceptions persist. For example, the myth that stainless steel automatically means quieter operation isn’t always accurate; noise levels depend on the motor and insulation quality, not just the drum material. Additionally, many assume energy-star-rated dishwashers are always the most eco-friendly choice, but some models with the rating may still consume more power due to features like extended drying cycles. It’s essential to scrutinize individual specifications rather than rely solely on marketing claims.
A common trap is believing that upgrading to the latest energy-star or quiet dishwasher will drastically cut your utility bills immediately. In reality, factors like proper loading, regular maintenance, and water hardness play significant roles in performance and efficiency. I’ve seen many overlook these aspects, resulting in underwhelming savings. For instance, utilizing a water softener can enhance dishwasher efficiency and prolong appliance lifespan, as hard water leads to mineral buildup that hampers cleaning and increases energy use. This is supported by experts at the Department of Energy, who recommend comprehensive water management strategies alongside appliance upgrades.
When selecting a model, consider the noise level in relation to your home’s layout. The label dB rating alone doesn’t tell the full story; a dishwasher’s sound might seem louder if your kitchen is open-plan or if the surrounding cabinetry lacks soundproofing. Brands that market ultra-quiet models, like those with noise ratings below 40dB, often incorporate insulation and vibration dampening to achieve this, which can justify the premium price.
Furthermore, many presume that a stainless steel interior guarantees maintenance-free durability. Yet, improper loading or neglecting routine cleaning can still cause rust spots or discoloration over time. Regular inspections and gentle cleaning help preserve appearance and function. For those concerned about rack longevity, exploring high-quality, rust-resistant racks can be a worthwhile investment.
In sum, the landscape of dishwasher technology is complex. Understanding the subtleties like the difference between marketing claims and real-world performance helps in making smarter choices. Don’t fall into the trap of oversimplification; dive deeper into specs, maintenance routines, and installation factors to truly capitalize on your appliance’s potential. Have you ever fallen into this trap? Let me know in the comments.
Embrace the Right Tools for Consistent Maintenance
Maintaining a dishwasher isn’t just about occasional cleaning; it requires specific tools that address the appliance’s unique needs. I find that investing in a quality spray arm cleaning brush makes a significant difference. Regularly checking and cleaning the spray arms with this narrow brush ensures water flows freely, preventing those stubborn spots and ensuring your dishes come out spotless. Additionally, a digital moisture meter helps me verify that seals and gaskets retain proper humidity levels, which is crucial for energy efficiency. These tools are essential because they allow precise diagnostics and maintenance, extending the lifespan of your appliance.
Implement Scheduled Deep Cleanings and Regular Checks
Personally, I schedule a deep clean of my dishwasher every three months. This involves running a cleaning cycle with a dishwasher-specific cleaner, which dissolves mineral buildup and sanitizes internal components. For the spray arms, I refer to manufacturer recommendations, like those from technical guides, to perform detailed inspections and cleanings. Over time, these routines prevent cloudiness, rust, and mechanical failures, saving costs and hassle. A tip I swear by is to turn off the power before inspecting or cleaning internal components—user safety always comes first.
Predicting the Future of Dishwasher Maintenance
Emerging smart diagnostic tools and IoT integration are set to revolutionize appliance upkeep. Devices that monitor water flow, sear seal integrity, and detect mineral accumulation in real-time could soon notify homeowners via smartphone apps. This proactive approach minimizes downtime and repairs. For example, some newer models now include sensors that alert you when it’s time for descaling or gasket replacement, making maintenance less of a chore and more of a preventative measure. Staying ahead with these innovations will help homeowners retain optimal performance and efficiency. To stay informed, regularly check trusted sources like our privacy policy for updates on emerging technologies.
How do I keep my dishwasher running smoothly over time?
Regular inspections, using the right specialized tools like spray arm brushes and moisture meters, and adhering to a scheduled cleaning routine are crucial. Implementing these practices ensures your dishwasher performs efficiently year after year. Don’t limit yourself to basic maintenance—investing in the specific equipment described here will pay off with cleaner dishes, less energy consumption, and fewer costly repairs. I challenge you to try cleaning your spray arms with a dedicated narrow brush this week; you might be surprised at the difference it makes in your appliance’s performance.
3 Surprising Lessons That Changed My Dishwasher Game
One of the most valuable insights I gained was that regular maintenance is about more than just cleaning—it’s about understanding the tiny details that affect performance. For example, I used to ignore the spray arms, assuming they always worked. Now, I know that cleaning and inspecting them regularly can prevent buildup and ensure sparkling dishes every time. Also, replacing worn racks with high-quality, rust-resistant options dramatically improved my cleaning results and extended my dishwasher’s lifespan. Lastly, investing in a water softener made a surprising difference by reducing mineral deposits, keeping the interior pristine and energy-efficient. These lessons have turned routine dishwasher care into a rewarding, simple process that guarantees reliable performance each time I run it.
Tools and Guides That Made a Difference in My Routine
My trusted toolkit includes a specialized spray arm cleaning brush, which reaches those hidden areas for thorough cleaning—making a noticeable difference. I also rely on detailed guides from reputable sources like our comprehensive rack selection guide to choose the best racks for durability and performance. An affordable moisture meter helps me monitor seal integrity, preventing leaks and loss of efficiency. Lastly, I keep a supply of high-quality dishwasher cleaners designed to dissolve mineral deposits and sanitize, ensuring my appliance stays in tip-top shape. These tools have empowered me to maintain a spotless, efficient dishwasher without costly repairs or replacements.
Take Action and Transform Your Dishwasher Routine Today
Imagine a dishwasher that looks brand new and performs flawlessly, saving you time, money, and frustration. By implementing these personal insights, trusted tools, and proactive habits, you can achieve that goal. Don’t wait for stubborn haze or rust spots to become major issues—start small, stay consistent, and enjoy the satisfaction of a shiny, efficient appliance that serves you well for years to come. Your journey to dishwasher mastery begins now; embrace these lessons and watch your kitchen success stories unfold. What step will you try first to improve your dishwasher’s performance? Share your plans below and let’s learn together.
![Why Your 2026 Stainless Dishwasher Door Feels Tacky [4 Fixes]](https://dishwashers.smartappliancereview.com/wp-content/uploads/2026/04/Why-Your-2026-Stainless-Dishwasher-Door-Feels-Tacky-4-Fixes.jpeg)