I was mid-sentence when I realized my dishwasher wasn’t cooperating. The dishes were loaded, the cycle completed, but as I reached to unload, I found the door stubbornly shut—refusing to pop open, leaving my plates dripping and my patience fraying. That familiar quiet hum of the 2026 model suddenly felt more like a passive-aggressive silence. Frustration mounted, and I thought, “Is this just a glitch or should I start planning a replacement?” That’s when I knew, I wasn’t alone in this struggle, and I had some diagnosing to do.
Why a Quiet Dishwasher That Won’t Dry Could Be a Bigger Problem Than You Think
Modern dishwashers, especially energy-efficient and ultra-quiet models, promise a peaceful kitchen experience. But what happens when that promise turns into a problem? The inability to pop open and dry properly isn’t just an annoyance; it might hint at deeper issues like malfunctioning door latches or sensor errors. Ignoring these symptoms can lead to prolonged moisture buildup, mold, or even damage to your appliance—costing time and money.
Will Fixing It Save You Money or Waste Your Time?
I used to think all dishwasher problems required a technician’s eye, but early on, I made the mistake of assuming nothing was salvageable without professional help. With some research and patience, I discovered that many issues are easy to fix — saving me hundreds. For instance, a simple reset or replacing a worn latch can restore both functionality and silence. Check out this detailed guide on preventing rack jams and door issues to get started.
So, if your 2026 quiet dishwasher is giving you a hard time, don’t rush to replace it. Instead, let’s dig into the common reasons behind these problems and how you can troubleshoot them yourself. Trust me, with just a few tools and some know-how, you can bring comfort and silence back to your kitchen.
Inspect and Reset the Door Lock Mechanism
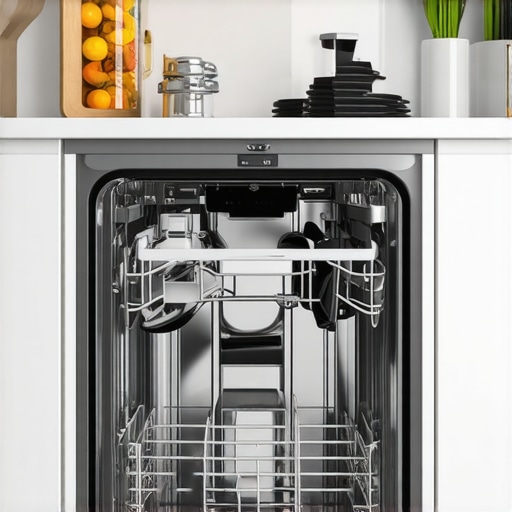
Start by unplugging your dishwasher to ensure safety. Locate the door latch assembly, usually near the door’s edge. Gently press and release the latch several times, observing if it moves freely. If it feels sticky or unresponsive, use a multimeter to test the latch’s continuity. A malfunctioning latch can prevent the door from opening after cycles, especially in energy-efficient models. Replacing a faulty latch often restores proper door operation.
Check and Clear the Sensor and Drain Path
Modern dishwashers rely on sensors to detect dryness and moisture levels. Remove the lower panels to access the sensor assembly, usually located near the door or bottom of the tub. Clean any dirt, grime, or water spots that may obstruct readings, using a soft cloth. Also, inspect the drain hose for clogs, as residual water can impact drying cycles. Clearing these obstructions ensures the sensor functions correctly, facilitating proper drying in quiet models.
Examine and Replace the Heating Element
Efficient drying depends on the heating element. Access it through the bottom panel—refer to your model’s manual for exact steps. Use a multimeter to test for continuity; if the element shows signs of damage or no readings, replace it. An unheated cycle will leave dishes damp, especially in stainless steel interiors that retain heat well. Upgrading to a stainless steel dishwasher can prevent pitting and improve heating performance over time.
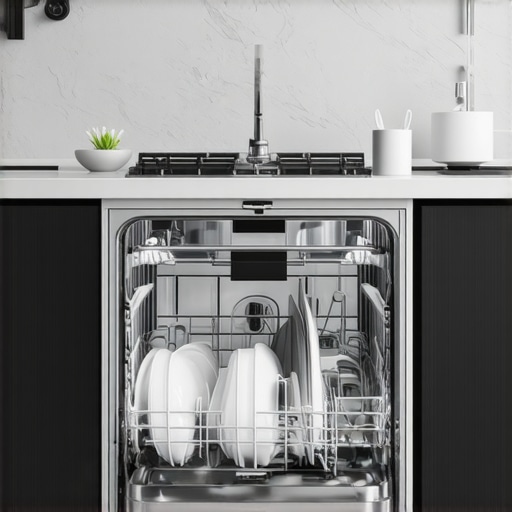
Assess the Dishwasher Rack and Loading Patterns
Incorrect rack placement can hinder drying and cause jams. Remove the racks and inspect for bent tines or worn wheels. Use the search function to find specific rack adjustment tips. Load dishes with space between them and avoid overcrowding, as steam needs access to all surfaces. For large items like cast iron or air fryer baskets, consult the guide on best loading practices. Proper placement promotes even heat distribution and drying efficiency.
Evaluate the Energy Settings and Cycle Selection
Energy Star models often have specialized cycles optimized for low water and power use. However, selecting the wrong cycle can extend wash times or reduce drying effectiveness. Switch to a high-temperature or intensive cycle when drying is an issue, and consider enabling the heater booster if available. Check for “fast cycles” or cycle options designed for quick drying. Adjusting these settings can dramatically improve the dryness of your stainless dishwasher’s contents.
Regular Maintenance Enhances Longevity
Remove mineral deposits using a descaling solution, especially if you have hard water. Regularly clean filters and spray arms to prevent clogs, which impede water flow and heat transfer. Use a vinegar rinse occasionally to eliminate soap scum and water spots, but avoid using undiluted vinegar on stainless steel to prevent pitting. Incorporate these routine checks into your maintenance schedule to maintain peak performance in your stainless steel and energy-efficient models.
Many homeowners assume that a stainless steel exterior signifies durability, a quiet model guarantees peace, and Energy Star ratings always mean optimal savings. However, as an appliance expert, I can tell you that these common perceptions often overlook crucial nuances. For instance, some think that stainless steel is inherently rust-proof, but cheap coatings and poor maintenance can lead to staining and pitting, which diminishes its appeal over time. Moreover, an ultra-quiet dishwasher doesn’t automatically mean it’s efficient or reliable — it might be intentionally designed to muffle essential signals, making troubleshooting tricky. Check out this comprehensive guide on upgrading to stainless steel models for insights into true durability.
A significant myth is that quiet dishwashers are always better. In reality, some ‘super-quiet’ models can mask operational issues like drainage problems or sensor malfunctions, which could result in lingering moisture or poor cleaning. It’s a trap to buy solely based on decibel ratings; instead, review actual performance metrics via noise level analyses. Plus, about Energy Star-rated appliances—many assume these units lower water and electricity bills substantially. While generally true, some models cut corners on cycles or drying effectiveness to achieve ratings, which might cost you more time and energy in the long run. A recent study from the Department of Energy emphasizes that proper cycle selection tailored to your needs can maximize savings, so don’t rely solely on labels.
For the sophisticated homeowner, the real key lies in understanding how these features interplay and where myths might mislead. Are you aware that some stainless finishes are susceptible to water spots unless you maintain them correctly? Or that a dishwasher’s rack design can significantly influence drying performance? Dive into this guide on choosing the right racks for optimal results.
Next time you face an appliance dilemma, consider these nuances rather than falling for surface-level assurances. Remember, a truly durable, efficient, and quiet dishwasher requires more than just good branding. It’s about understanding the technical subtleties and making informed decisions. Have you ever fallen into this trap? Let me know in the comments.Maintaining your stainless dishwasher and ensuring its long-term performance requires the right tools and a proactive approach. I personally rely on a high-quality multimeter, like the Fluke 117, to test electrical components such as heating elements and door latches, which are crucial for dry cycles and door operation. Additionally, a flexible nylon brush helps me clean spray arms and filters without scratching the stainless steel surface, maintaining both hygiene and appearance. For software troubleshooting, I use diagnostic mode functions detailed in manufacturer manuals—these allow quick identification of sensor errors or cycle malfunctions, saving time and service costs. Looking ahead, the trend is shifting toward integrated smart diagnostics and IoT-enabled appliances, which will simplify maintenance and provide real-time alerts for issues like clogged drains or failing sensors. To keep your dishwasher humming, I recommend scheduling a quarterly inspection where you verify the cleanliness of water pathways and inspect seals for wear. Regular descaling with commercial solutions like Puly Caff helps prevent mineral buildup, especially in hard water areas, prolonging component life and ensuring consistent drying performance.
How do I maintain my dishwasher over time?
Routine maintenance involves more than just occasional cleaning. I recommend keeping a set of precision screwdrivers to access internal components like the heating element or control board for minor repairs or part replacements. A thermal imaging camera can be a game-changer—allowing you to spot uneven heating or insulation issues before they escalate, as described in detailed technical guides from appliance repair experts. Remember, consistent checks of door seals and racks prevent leaks, rust, and jams, thereby extending the device’s lifespan. For the ambitious homeowner, investing in a leak detection system connected to your smartphone can alert you early about minor drips before they cause mold or water damage. As the industry evolves, manufacturers are integrating more advanced sensors and self-diagnostic tools—making it easier to keep your dishwasher in prime condition without professional intervention. Embracing these tools and practices now will prepare you for the future of maintenance, where AI-driven diagnostics will predict failures before they happen. If you haven’t yet, try using a multimeter for your diagnostic checks—it’s a simple step that can save you hundreds in the long run. For more advanced maintenance techniques, visit our detailed troubleshooting guide and keep your quiet, energy-efficient dishwasher running at peak performance.
What I Wish I Knew About stainless dishwasher Longevity Early On
One of the biggest revelations in maintaining a stainless dishwasher is that surface appearance isn’t the sole indicator of durability. I used to think a shiny exterior meant it was built to last, but I learned that internal components like the heating element and door latch often wear out unnoticed until a cycle fails. Regular internal inspections and knowledge of common failure points can save you from sudden breakdowns.
Another lesson I embrace now: the importance of cycle selection and load pattern. Overloading or improper cycle choices can cause lingering moisture or stress on racks, shortening lifespan. Small adjustments, like spacing dishes correctly and choosing high-temperature cycles when necessary, can make a significant difference over time.
Lastly, I realized that routine maintenance isn’t just about cleaning—it’s about proactive checks. Descaling, inspecting seals, and lubrication prevent future issues. These insights transformed my approach from reactive repairs to prevention, saving me money and frustration.
My EssentialToolkit for dishwashers
My go-to set includes a good multimeter for electrical tests, a soft-bristle nylon brush for spray arms, and a quality descaling solution. Using these tools, I can diagnose issues early, clean internal parts effectively, and extend the dishwasher’s life. I trust these because they empower me to troubleshoot confidently and avoid unnecessary service calls.
Additionally, I rely on manufacturer manuals and reliable online guides. Knowing the inner workings through trusted resources has been invaluable — especially for those little fixes that don’t require a professional technician but can prevent more costly repairs down the line.
Your Turn to Embrace Smart Maintenance
Looking after a stainless dishwasher isn’t just about cleaning; it’s about understanding its unique needs and responding scientifically. When you invest in routine checks and learn the quirks of your model, you ensure peace, performance, and longevity in your kitchen. Remember, the effort you put in today manifests as fewer repairs tomorrow.
What maintenance step has made the most difference in your dishwasher’s performance? Let me know below and share your secrets!
,