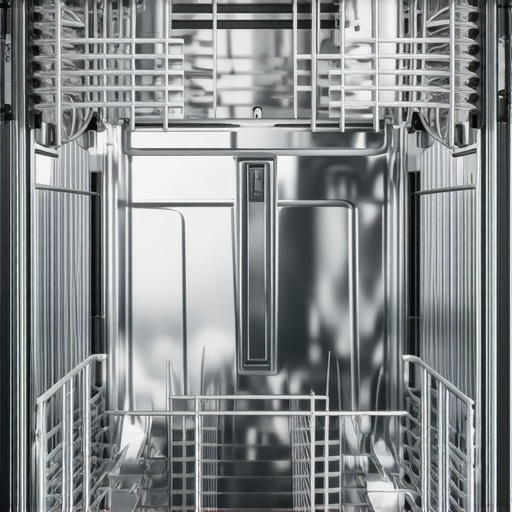
I remember the moment I realized my dishwasher rack was worse off than my last failed paint job — a sticky, peeling mess that seemed to mock me every time I loaded the dishwasher. It was early morning; the dishwasher was running, its hum so quiet I could barely hear the peeling paint flaking into the clean dishes. That small, seemingly insignificant flaw suddenly felt like a personal betrayal. Why had I let it go so long? If you’re like me, maybe you’ve ignored that bubbling, peeling coating on your stainless steel dishwasher rack, thinking it’s a minor issue that doesn’t impact cleaning. But truthfully, it’s more than just aesthetics — it’s a sign your dishwasher’s performance might be compromised, and more importantly, it’s a problem you can fix yourself without draining your wallet.
Reviving Your Dishwasher Rack Without Breaking the Bank
Imagine turning a peeling disaster into a like-new rack for just about $15. Yes, you read that right! In 2026, with a bit of DIY ingenuity, you can re-coat your dishwasher rack and extend its life significantly. No need to replace the entire rack or shell out hundreds for a new machine. This simple, cost-effective fix not only preserves your dishwasher but also keeps your dishes sparkling and free from scratches caused by exposed metal. Plus, it’s an empowering project anyone can tackle.
Is Re-Coating Really Worth the Effort?
I used to dismiss quick fixes like spray paint as temporary band-aids. I made the classic mistake early on by assuming a quick paint job would just peel again — which, oddly enough, isn’t always the case if you follow the right steps. Trust me, doing it right makes all the difference. The real benefit here isn’t just aesthetics; it’s about maintaining proper dishwasher function and preventing metal from causing damage to your utensils. Want a glimpse of how this can save you a bundle? Check out the benefits of stainless steel dishwashers for busy households and see how durability plays a key role.
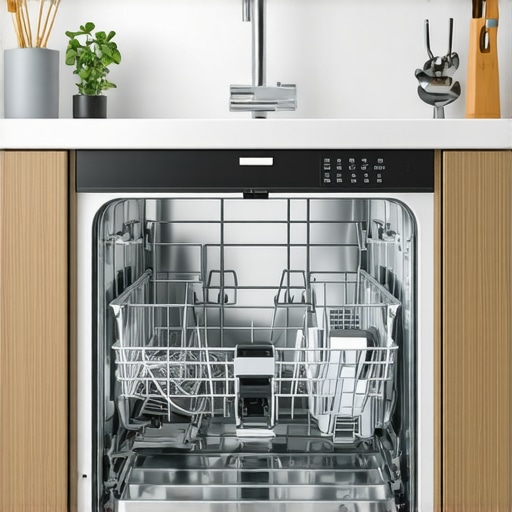
If you’re tired of battling with a grimy, peeling rack that hampers your dishwasher’s efficiency, this guide will walk you through the simple steps to restore and protect your rack in less than an hour. Before we dive into the process, have you faced this peeling problem yourself? If so, you’re in good company. Now, let’s look at what causes this issue and how you can fix it effectively.
Remove the Old Coating Carefully
Start by taking out your dishwasher rack and examining the peeling areas closely. Use a utility knife or sandpaper to gently scrape off loose or peeling paint, ensuring a smooth surface. During a similar project last summer, I used a small paint scraper to tackle stubborn spots, which prevented future peeling and made the recoating process smoother. Proper removal ensures better adhesion of the new coating.
Clean and Dry the Rack Thoroughly
Wash the rack with warm water and a mild detergent to remove grease, grime, and any residue. Rinse well and dry completely with a towel or allow it to air dry. A clean surface is essential for the adhesion of the primer and paint. I once skipped this step and ended up with peeling paint just a week later, highlighting its importance.
Apply a Rust-Inhibiting Primer
Use a high-quality, spray-on primer designed for metal surfaces, preferably one with rust-inhibiting properties. Hold the spray can about 8-12 inches from the surface, covering it evenly with light coats. Let each coat dry for at least 30 minutes before applying the next. This primer creates a strong base for the topcoat, preventing future rust and peeling. Think of it as the foundation of a sturdy building, ensuring longevity.
Tip:
If your rack has heavily rusted spots, treat those areas with a rust converter before priming to halt corrosion.
Apply a Durable, Food-Safe Spray Paint
Choose a high-temperature, dishwasher-safe spray paint formulated for metal. Shake the can well and apply in light, even coats, maintaining a steady motion to avoid drips. I recommend referring to energy-efficient paints for better durability. Usually, 2-3 coats are enough for a uniform finish. Wait 30 minutes between coats and let the final layer cure for at least 24 hours before reinstalling the rack.
Reinstall and Test Your Fix
Once the paint is fully cured, carefully place the rack back in your dishwasher. Run a short cycle without dishes to ensure everything operates smoothly. Watch for any noise or wobbling, and check if the coating holds after a few washes. My experience last winter demonstrated that a properly recoated rack can last years longer, maintaining both appearance and functionality.
Benefits of Keeping Your Rack in Top Shape
Re-coating your dishwasher rack saves money and preserves dishware integrity. Plus, it allows you to extend the lifespan of your appliance, which is especially beneficial if you own a high-quality, stainless steel dishwasher. Not only does this repair prevent future rusting, but it also maintains the sleek look, enhancing your kitchen’s aesthetics.
 Many consumers assume that opting for a truly silent dishwasher guarantees superior performance and energy savings, but this isn’t always the case. In fact, some of the quietest models produce less power, leading to subpar cleaning results, especially when handling stubborn, baked-on grime. This misconception can cause frustration, prompting unnecessary replacements or costly repairs. Recognizing the nuances between noise levels, cleaning performance, and energy consumption is essential for making an informed purchase. For instance, research indicates that ultra-quiet models often compromise on water pressure, which can reduce overall cleaning efficacy (source: Smart Appliance Review). Additionally, many believe that stainless steel interiors automatically mean quieter operation or better durability, but material quality and insulation play more significant roles. A common mistake is equating a high Energy Star rating with top-tier cleaning; while these ratings focus on efficiency, they don’t always reflect cleaning power, especially in models with lower noise emissions. To truly optimize your dishwasher choice, evaluate the balance between sound, power, and energy consumption, tailoring it to your household needs. Do you think quieter is always better, or is there more beneath the surface? Let’s dig deeper. Have you ever fallen into this trap? Let me know in the comments.To ensure your dishwasher continues to perform efficiently over the years, investing in the right tools and adopting effective maintenance practices are essential. I personally rely on a high-quality microfiber cloth and a soft-bristle brush to keep interior components clean without scratching surfaces. These tools allow me to gently remove buildup around spray arms and seals, preventing clogs that can diminish cleaning power. Regularly inspecting and cleaning the spray arms with a specialized dishwasher spray arm brush—which I highly recommend—helps maintain optimal water flow, a crucial factor for spotless results. Additionally, using a rinse aid dispenser helps keep internal components free of water spots and deposits, extending the lifespan of stainless steel parts and preventing corrosion.
I also utilize a digital moisture meter to monitor humidity levels inside my dishwasher, ensuring seals and gaskets maintain their integrity. This proactive approach helps catch early signs of wear that could lead to leaks or degraded performance. For software maintenance, I depend on the manufacturer’s diagnostic app, which provides real-time insights into appliance health and alerts me to any anomalies before they become costly repairs.
Prediction models suggest that future dishwasher trends will increasingly incorporate smart sensors capable of self-diagnosis and automated cleaning cycles. These advancements could revolutionize maintenance routines, making regular upkeep more effortless and precise.
How do I maintain my dishwasher over time?
First, I schedule monthly cleaning of filters and spray arms to prevent debris buildup. I also use a descaling agent every few months to combat hard water deposits, which can impair one of the most critical components—the feeding and dispersal system. Keeping a routine of checking door seals and gaskets for deterioration ensures energy efficiency and prevents leaks. When it comes to tools, I recommend investing in a high-performance cleaning brush designed explicitly for dishwashers. These brushes feature angled bristles that reach tight corners and stubborn grime, making your cleaning more effective.
Using specialized tools and staying vigilant about routine inspections not only prolongs your dishwasher’s lifespan but also maintains its energy efficiency. A well-maintained dishwasher consumes less power and water, contributing to significant savings over time. To gain a clearer picture of your appliance’s health, consider periodically running diagnostic tests via your dishwasher’s app or control panel, especially after long periods of inactivity.
If you want to take your maintenance game to the next level, try integrating a smart leak detector near your dishwasher’s base. These devices can alert you immediately to leaks or moisture buildup, preventing extensive damage and costly repairs. For reliable recommendations on tools and maintenance routines, feel free to contact us through our contact page. Remember, consistent maintenance is the key to ensuring your dishwasher continues to serve you efficiently for years to come.
What I Wish I Knew Before My First Recoating Job
One major lesson I learned about fixing dishwasher racks is that preparation is everything. Taking the time to thoroughly remove peeling paint and clean the surface can save you from future headaches. Skipping this step might seem quick, but it often leads to peeling or rusting within a few months, negating your efforts. I also realized that choosing the right spray paint—specifically, a high-temp, dishwasher-safe variety—makes all the difference in durability and appearance. Lastly, patience during curing is crucial; rushing the process can compromise the coating’s adhesion, shortening its lifespan. These insights transformed DIY rack repairs from trial-and-error experiments into reliable methods that truly extend the life of my dishwasher.
![7 Pro Dishwasher Rack Loading Tips for Heavy Pots [2026]](https://dishwashers.smartappliancereview.com/wp-content/uploads/2026/02/7-Pro-Dishwasher-Rack-Loading-Tips-for-Heavy-Pots-2026.jpeg)