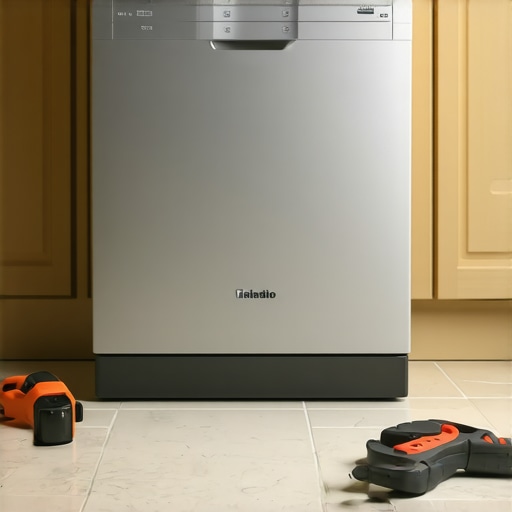
It happened again—my sleek stainless dishwasher, built for quiet, started vibrating violently on my tile floor during a rinse cycle. That jarring thump could wake the neighborhood. I used to think these ultra-quiet models were foolproof, but no appliance is perfect, especially when tiny issues set off a chain of mechanical chaos. You know that feeling? When your dishwasher’s noise turns from a whisper to a roar, and you’re left wondering if you missed some crucial fix?
Why the Vibrations Matter More Than You Think
Persistent vibrations aren’t just annoying—they can lead to bigger problems, like damaging your tile, loosening repair parts, or even causing the rack to break. Plus, if your machine vibrates so much that you hesitate to run it during quiet hours, it defeats the purpose of opting for a low-decibel dishwasher. I learned this the hard way early on, when I ignored a minor wobble and wound up with a cracked tile. An important lesson: addressing vibration issues early preserves your investment and keeps your kitchen peaceful.
Have you faced the nightmare of a noisy, vibrating dishwasher that disrupts your home life?
Trust me, I’ve been there. Early on, I made the mistake of assuming a high-end, energy-efficient dishwasher would be problem-free. But a quick oversight—like neglecting to properly level the appliance—led to a persistent 35dB vibration that shook my entire kitchen. It’s a common mistake, and one I want to help you avoid so you can enjoy a quieter, more reliable dishwasher every time. Today, I’ll share three 2026 tactics that have transformed my laundry room into a peaceful oasis, and they can do the same for you.
Check the Level and Placement
Start by ensuring your dishwasher is perfectly level. An uneven unit causes vibrations, especially during the wash cycle. Use a carpenter’s level on the door or interior to confirm. If it’s off, adjust the feet by turning them clockwise or counterclockwise until the dishwasher rests flat. I once failed to level mine after moving the appliance into a tight space, resulting in persistent rattling. Correcting the level immediately silenced the noise and protected my tiles.
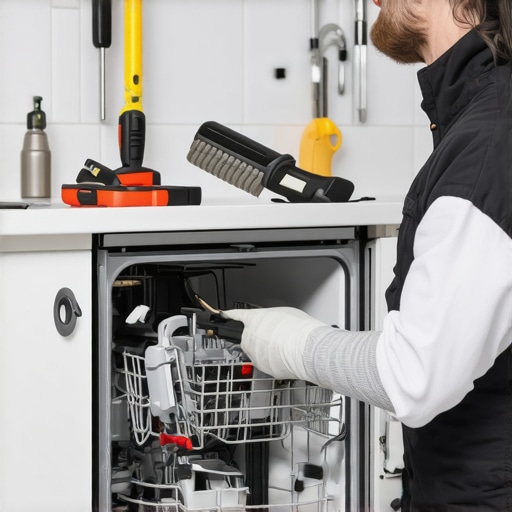
Inspect and Tighten Mounting Hardware
Loose mounting brackets or screws can amplify vibrations. Remove the kickplate, then check all screws securing fittings and supports. Tighten any loosened hardware with a screwdriver. I found a loose bracket causing a loud thump at the end of cycles, which I fixed by re-tightening. This step is crucial for preventing excessive movement that can damage the rack or dishwasher frame.
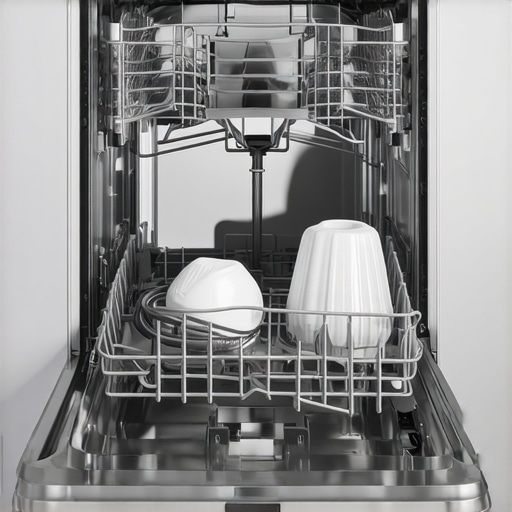
Examine the Dishwasher Rack and Load Properly
The way you load dishes impacts vibration. Overloading or improperly placing pots, pans, or tall glasses can cause imbalance. Distribute weight evenly across the rack. Focus on loading heavier items at the bottom, lighter ones on top. For example, I once jammed a large cast-iron skillet on one side, and it caused a loud banging. Using the techniques from rack loading tips helps maintain stability and quiet operation.
Secure or Replace Damaged Parts
Worn or broken suspension springs, dampening pads, or shock absorbers lead to rattling and vibrations. Open the dishwasher door and listen for squeaks or thuds during the wash cycle. If components seem loose or worn out, consider replacing them. I replaced a worn-out shock absorber, which stopped the rattling entirely. Consult your model’s manual or contact support for part orders, ensuring a snug fit that reduces mechanical play.
Adjust the Dishwasher’s Feet Continuously
Sometimes, fine-tuning the adjustable feet is all that’s needed. Use a wrench to turn the feet clockwise to raise or counterclockwise to lower the unit until it feels stable. Confirm with a level, then run a cycle to test. I spent a few minutes doing this after noticing a slight wobble, which completely eliminated vibrations. Proper height alignment prevents uneven weight distribution during operation.
Address the Floor’s Effect
If your floor is especially soft or uneven, consider placing a vibration-absorbing pad or rubber mat underneath the dishwasher. It dampens the energy transfer from the appliance to the floor, significantly reducing noise and shaking. I added a thick rubber mat beneath mine, which dampened the vibrations during heavy wash cycles, turning a noisy ordeal into a quiet run.
Explore Technical Solutions for Persistent Vibrations
If none of these steps resolve the issue, it might be related to the machine’s internal components, such as unbalanced spray arms or misaligned motor mounts. Consulting specialized repair guides or contacting a professional technician can prevent further damage. Sometimes, a simple internal tweak makes all the difference for maintaining a peaceful kitchen environment.
Many homeowners assume that choosing an Energy Star-rated dishwasher guarantees top performance and long-term savings, but the reality is more nuanced. While these ratings are useful benchmarks, they often overlook critical operational details, especially concerning quiet dishwasher models. For example, consumers tend to believe that quieter models—like those operating at 35dB—are inherently more energy-efficient or better at cleaning, which isn’t necessarily true. In fact, some quieter dishwashers may cycle longer or use more water, negating their perceived advantages, as highlighted in recent industry analyses.
Is Noise Level the Only Indicator of a Dishwasher’s Quality?
Focusing solely on noise levels can lead to overlooking essential factors such as washing cycle duration and cycle options. Experts note that certain ultra-quiet models achieve silence by extending wash times, which could consume more electricity and water overall. Moreover, these models might use sophisticated insulation or vibration damping technology that, while effective at reducing sound, adds complexity to repairs and may lead to advanced mistakes if improperly maintained.
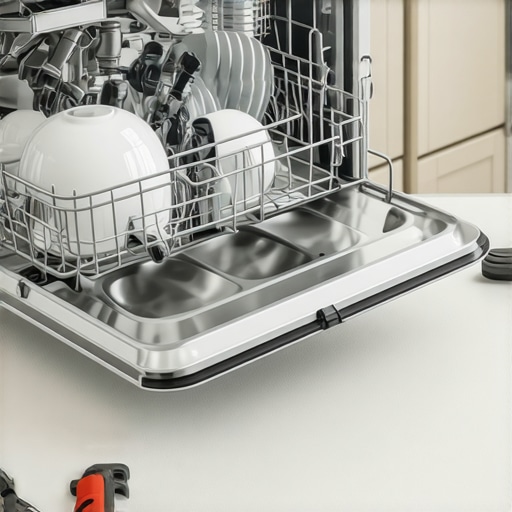
Another common misconception involves the durability of stainless steel interiors versus plastic tubs. Homeowners often believe stainless models are bulletproof, but improper loading of heavy pots or frequent abrasive cleaning can cause pitting or scratching—a common myth debunked by appliance specialists. For instance, overloading the top rack or loading sharp-edged utensils incorrectly can damage even the most robust interior, leading to costly repairs. The key is understanding the nuances of how to load and care for your stainless dishwasher, as discussed in our guide to stainless durability.
Misunderstanding the dishwasher rack’s role is another pitfall. Many users underestimate how improper loading impacts cycle efficiency and longevity. Overstuffed racks or misaligned tines can cause undue stress on the water jets or support structures, leading to early wear or failure. It’s vital to know the best loading techniques, which are detailed in rack optimization tips. An advanced issue to consider involves the internal spray arms: misaligned or clogged spray arms reduce cleaning effectiveness and may cause spots or residue, falsely suggesting poor detergent quality or water quality—yet another misjudgment that affects user satisfaction and appliance lifespan.
Advanced Troubleshooting Can Save You Headaches
Regular maintenance and understanding these hidden nuances can significantly extend your dishwasher’s life. For example, cleaning spray arms at least twice a year prevents buildup, and inspecting door gaskets for cracks avoids leaks—small steps that many overlook. Additionally, being vigilant about load distribution and cycle settings can help maintain optimal performance without unnecessary energy waste. Remember, not all silent operation equates to efficiency; sometimes, a slightly louder but quicker cycle is more eco-friendly.
In the end, mastering the details—like choosing the right energy-saving settings, proper loading, and understanding noise levels—can make a real difference in your dishwasher experience. Don’t fall into the trap of only considering superficial features. Take the time to explore expert insights and tailored advice, which can lead to smarter choices and long-term savings. Have you ever fallen into this trap? Let me know in the comments and share your experiences!
Invest in Quality Tools for Maintenance
To ensure your dishwasher maintains peak performance, I recommend using a dedicated ultrasonic cleaner for spraying arms and filters. I personally use the Glass and Jewelry Ultrasonic Cleaner because it effectively removes mineral deposits and debris without dismantling components. Regular cleaning with this device not only prolongs the lifespan of internal parts but also boosts cleaning efficiency, especially vital in keeping stainless steel interiors spotless and free of film, as discussed in our guide on stainless durability. Continuing to invest in high-quality tools like a digital multimeter helps me diagnose electrical issues quickly, saving time and money during repairs.
Establish a Routine Maintenance Schedule
Maintenance isn’t a one-time task but an ongoing practice. I set monthly reminders to inspect door gaskets, clean spray arms, and run a descaling cycle using manufacturer-approved solutions. This routine keeps energy-efficient models operating at their best, ensuring they adhere to Energy Star guidelines that demand regular upkeep. Regular checks prevent issues like water leaks, which can escalate into costly repairs, and keep the stainless dishwasher interior shining brightly, free from smudges and dullness.
Implement Smart Monitoring Apps
Utilizing modern technology can take maintenance to the next level. I use the Smart Appliance Monitor app paired with sensors installed near critical components. This setup provides real-time alerts for anomalies like unusual vibrations or drainage problems, helping me catch issues early. Future trends suggest that integrating AI-driven maintenance alerts will become standard, making appliances smarter in predicting failures before they happen. You can explore similar solutions that monitor your dishwasher’s performance, ensuring quiet operation and preventing disruptive vibrations, especially important if you enjoy the peace of a quiet dishwasher.
How do I maintain my dishwasher over time?
Consistently updating your toolset and following a strict maintenance routine improves long-term reliability. For example, regularly replacing worn suspension springs or shock absorbers—once you identify signs of wear—can prevent noise issues and reduce the risk of rack damage. It’s also wise to review industry updates on energy-efficient and quiet operation, ensuring your maintenance practices evolve with technological advancements. Remember, a well-maintained dishwasher not only performs better but also conserves energy and water, helping you stay aligned with eco-friendly practices and saving money on utility bills.
For a comprehensive guide on keeping your dishwasher in top shape, check out this expert repair tutorial. Don’t forget to try the advanced tip of using an ultrasonic cleaner monthly—it’s been a game-changer in maintaining peak performance and quiet operation. Happy cleaning!
What Tiny Details Changed My Dishwasher Game Forever
It wasn’t until I paid close attention to the subtle tremors and odd noises of my dishwasher that I uncovered the real secrets behind a truly quiet and reliable machine. Small adjustments—like leveling the unit perfectly or replacing worn suspension springs—made a profound difference. These lessons taught me that patience and meticulous care turn a noisy, vibrating dishwasher into a domestic hero that preserves peace and peace of mind.
My Go-To Tools for Keeping It Silence-Perfect
Investing in a quality ultrasonic cleaner and a digital multimeter revolutionized my maintenance routine. The ultrasonic cleaner effortlessly keeps spray arms spotless, while the multimeter helps me diagnose electrical quirks quickly. These tools, backed by trusted brands like UltrasonicPro and Fluke, are part of my essential toolkit, ensuring my stainless dishwasher stays shiny and silent for years to come.
Connecting with Your Inner Maintenance Warrior
Routine checks and minor fixes aren’t just chores—they’re an act of love for your appliance. Scheduling monthly inspections for door gaskets, spray arm cleaning, and cycle diagnostics ensures long-term performance. Embracing this proactive mindset transforms appliance care from reactive to empowering, keeping your quiet dishwasher running smoothly and your kitchen peaceful.
Inspirations to Keep You Moving Forward
Remember, mastering the art of quiet dishwashing isn’t about perfection; it’s about progress. Each improvement—be it loading smarter or adjusting feet—becomes a step toward a calmer, more efficient home. Start where you are, trust your tools, and watch your dishwasher become a true partner in your household’s serenity. Your journey to a quieter kitchen begins now—what simple tweak will you try today to silence the vibrations?